1:24 Lola T70 Skip Hudson Slot Car ver.2
1:24 Lola T70 Skip Hudson CanAm car
Some years ago, I build an 1:24 Slot Car copy of Skip Hudsons beautiful Lola T70 CanAm car. http://neckcheese.blogspot.dk/2014/01/124-lola-t70-skip-hudson-wp-canam-car.html
This has been sold long ago, but when I was asked to build a similar model for a special event, I was happy to meet the challenge and decided to build the complete car i 60's style with chassis soldered from brass and using period vintage components when possible.
Here are some pics of the original car in 1966/67 - click on the pictures to see a larger version:
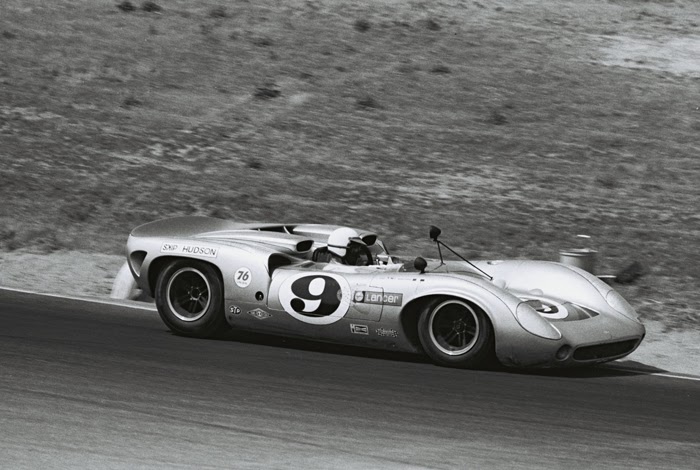


Steve McQueen tested the car on Riverside for an american magazine:

This is the chassis I built for this project. It is an attempt to make a ca.1967 homebuilt brass chassis. The motor bracket is from the period and the early Mabuchi FT16D motor is assembled from period parts. The armature is cleaned and balanced and everything is cleaned and looks like new. I painted the can the dark metallic blue I used when I built motors as a kid :-)
Wheels and axles are 3mm (European norm) to make it easier to get replacements. The guide is a period Dynamic guide.
The chassis is track tested and runs as good as it looks ;-)
Wheels and axles are 3mm (European norm) to make it easier to get replacements. The guide is a period Dynamic guide.
The chassis is track tested and runs as good as it looks ;-)


It was impossible to find an original Lancer body, but the body is a repop (copy) of an original body made by my friend John Dilworth, who has been a great help in many projects.
I have redraw much of the original decals and added more details. Some are laser printed and some are ALPS printed, depending of the layout.
I have redraw much of the original decals and added more details. Some are laser printed and some are ALPS printed, depending of the layout.

The decoration was laser printed and mounted directly inside the body. This is not for the faint hearted and had to be redone a couple of times to be perfect, due to the curvature of the body. Microscale Micro Set and Micro Sol wa a good help to adapt the decals to the body.

The ALPS printed decals and additional sponsor markings were mounted carefully using thin clear acrylic lacquer.

Wheel inserts were made using period plastic model wheels turned down on a lathe and recast in PU resin. I added simple disc brake copies behind the inserts.

Now it's time for painting the decoration on the car. On the original this looks like the polished steel on industrial kitchens and i replicated this as a combination of decals and painted silver backing. It took some concentration to paint the very narrow patterns. The paint used was Vallejo Aluminium.

The first body I painted was a disaster as the clear lacquer used to seal to decals was clearly shown as strange patterns in the surface of the body and I had to scrap many hours of work :-(
This looks good and I hope to succeed with this one
This looks good and I hope to succeed with this one

At last it succeeded !! :-)
The paint used was a strange mixture of Vallejo Aluminium and Premium Metallic blue plus Parma Faskolor Pearl silver
The paint used was a strange mixture of Vallejo Aluminium and Premium Metallic blue plus Parma Faskolor Pearl silver

Wheel inserts are painted and mounted and Firestone logos are added. I made a special driver insert for this car as the chassis has inline drive and the motor takes up a bit of room in the driver compartment. The driver insert is here painted in the body colour as per the original.


Next step is detailing the body and insert

Finished body seen from the rear

Driver head is The Jim Clark head from Immense miniatures


After a lot of challenges, the car turned our beautifully and I am very happy with the result:
NEC July 2017
NEC July 2017